Anti-Virus Setup
Disable Virus & Threat Protection
Windows Security → Virus & Threat Protection → turn off all four settings
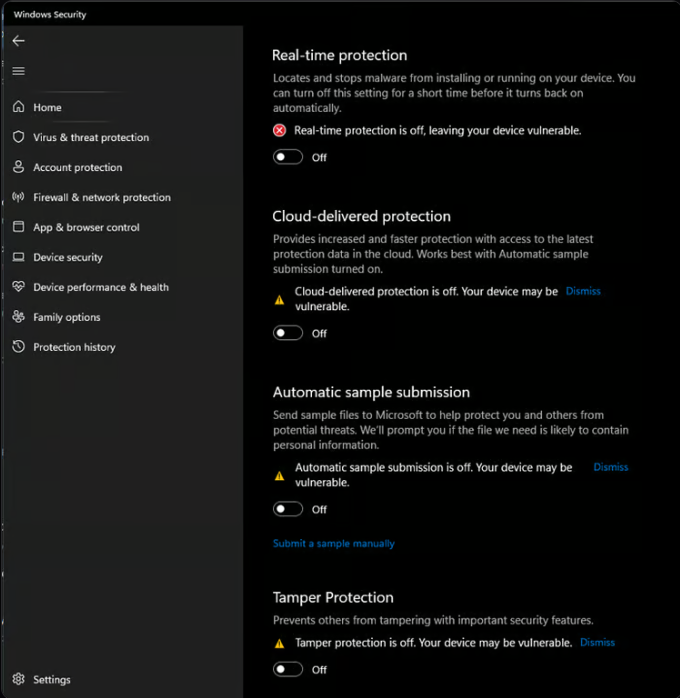
Reference: Virus & Threat Protection with all settings off
Download DControl — run it and click Disable Windows Defender
Download link is available in your support ticket.
Disable the Windows Firewall
Windows Security → Firewall & Network Protection → turn off all three options
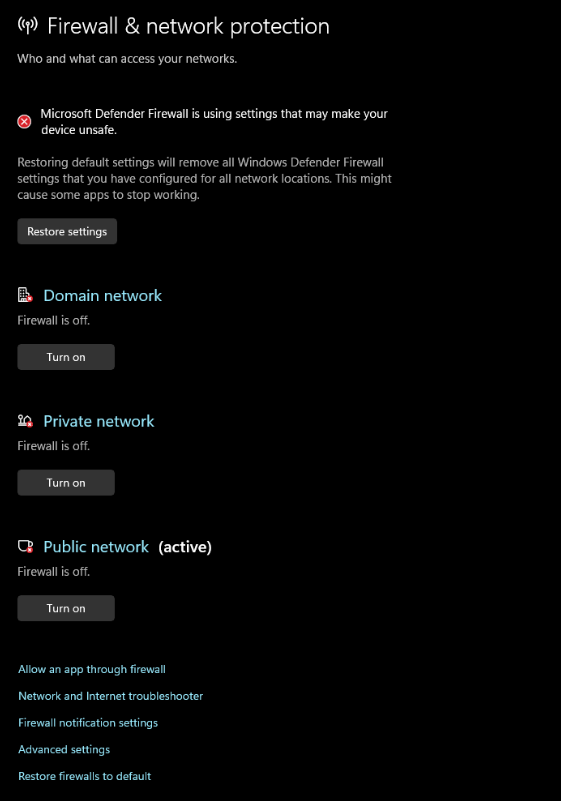
Reference: Firewall & network protection — all off
Disable Smart App Control
App & Browser Control → Smart App Control → Off
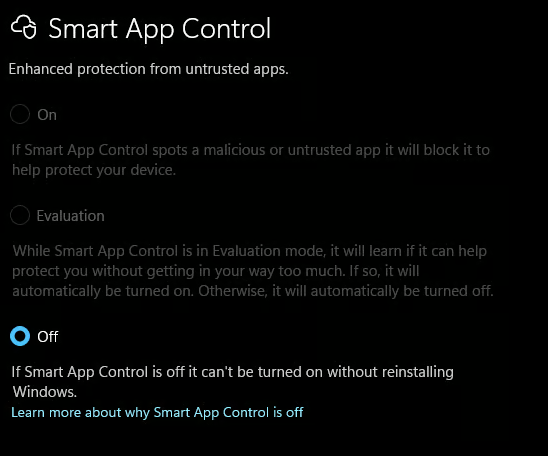
Reference: Smart App Control set to Off
Disable Exploit Protection
App & Browser Control → Exploit protection settings → turn each option off
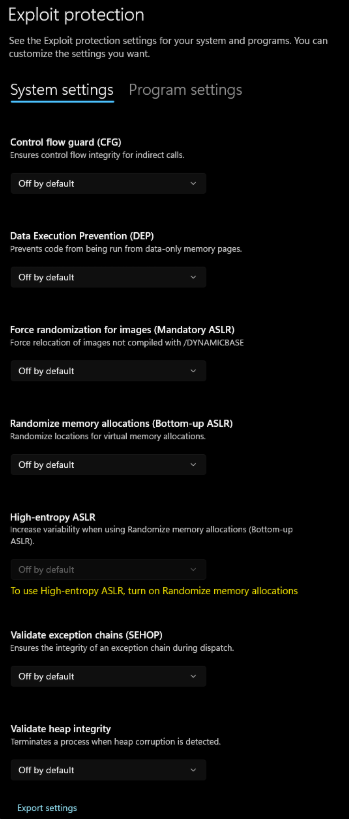
Reference: Exploit Protection — all options Off by default
Disable Core Isolation
Device Security → Core isolation details → disable all settings
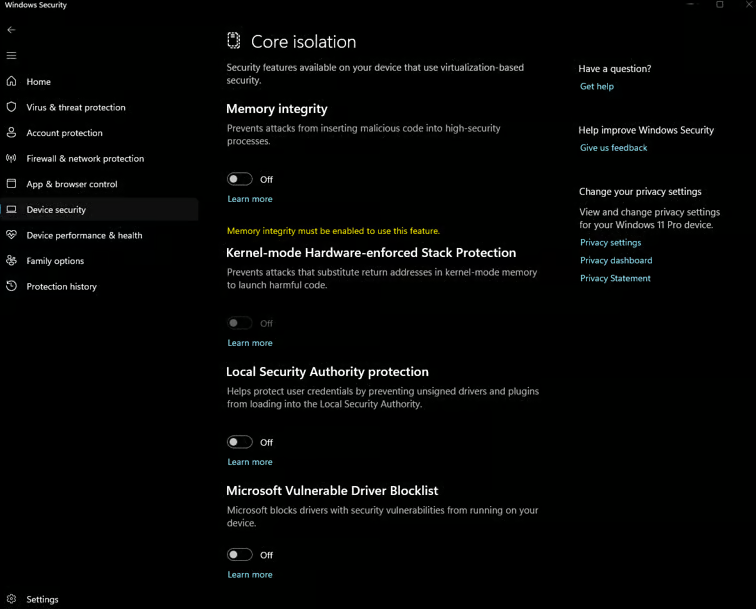
Reference: Core Isolation with all settings off
Uninstall 3rd party game anti-cheats that run 24/7
Uninstall via Add or Remove Programs:
- Riot Client & Vanguard
- FACEIT
- Any third-party antivirus software
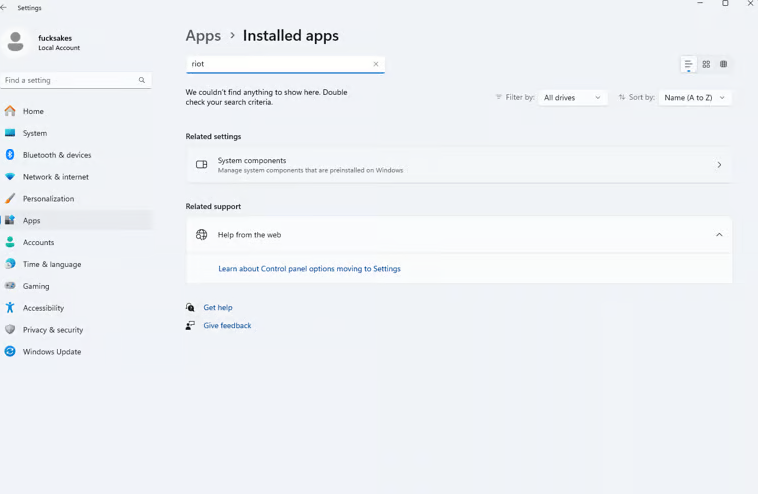
Reference: Add or Remove Programs (Installed Apps)
Restart your PC
Enable CPU Virtualization
This product requires CPU Virtualization to be enabled in your PC's BIOS — it uses a Hypervisor. If it's disabled, you will be prompted to enable it by the loader.
Running the Loader
Run the loader
During first launch, the file may download an update and close — reopen it again. It also randomizes its file name on first run, so place it in a dedicated folder in your Downloads to avoid losing track of it.
Enter your key & click Login
Your key can be found under Deliverables within your invoice.
Ensure one of the valid overlays is running
This product requires one of the supported overlays below. Follow the guide to set it up properly.
Discord Overlay Setup
Find the Discord overlay settings
Discord Settings → Game Overlay
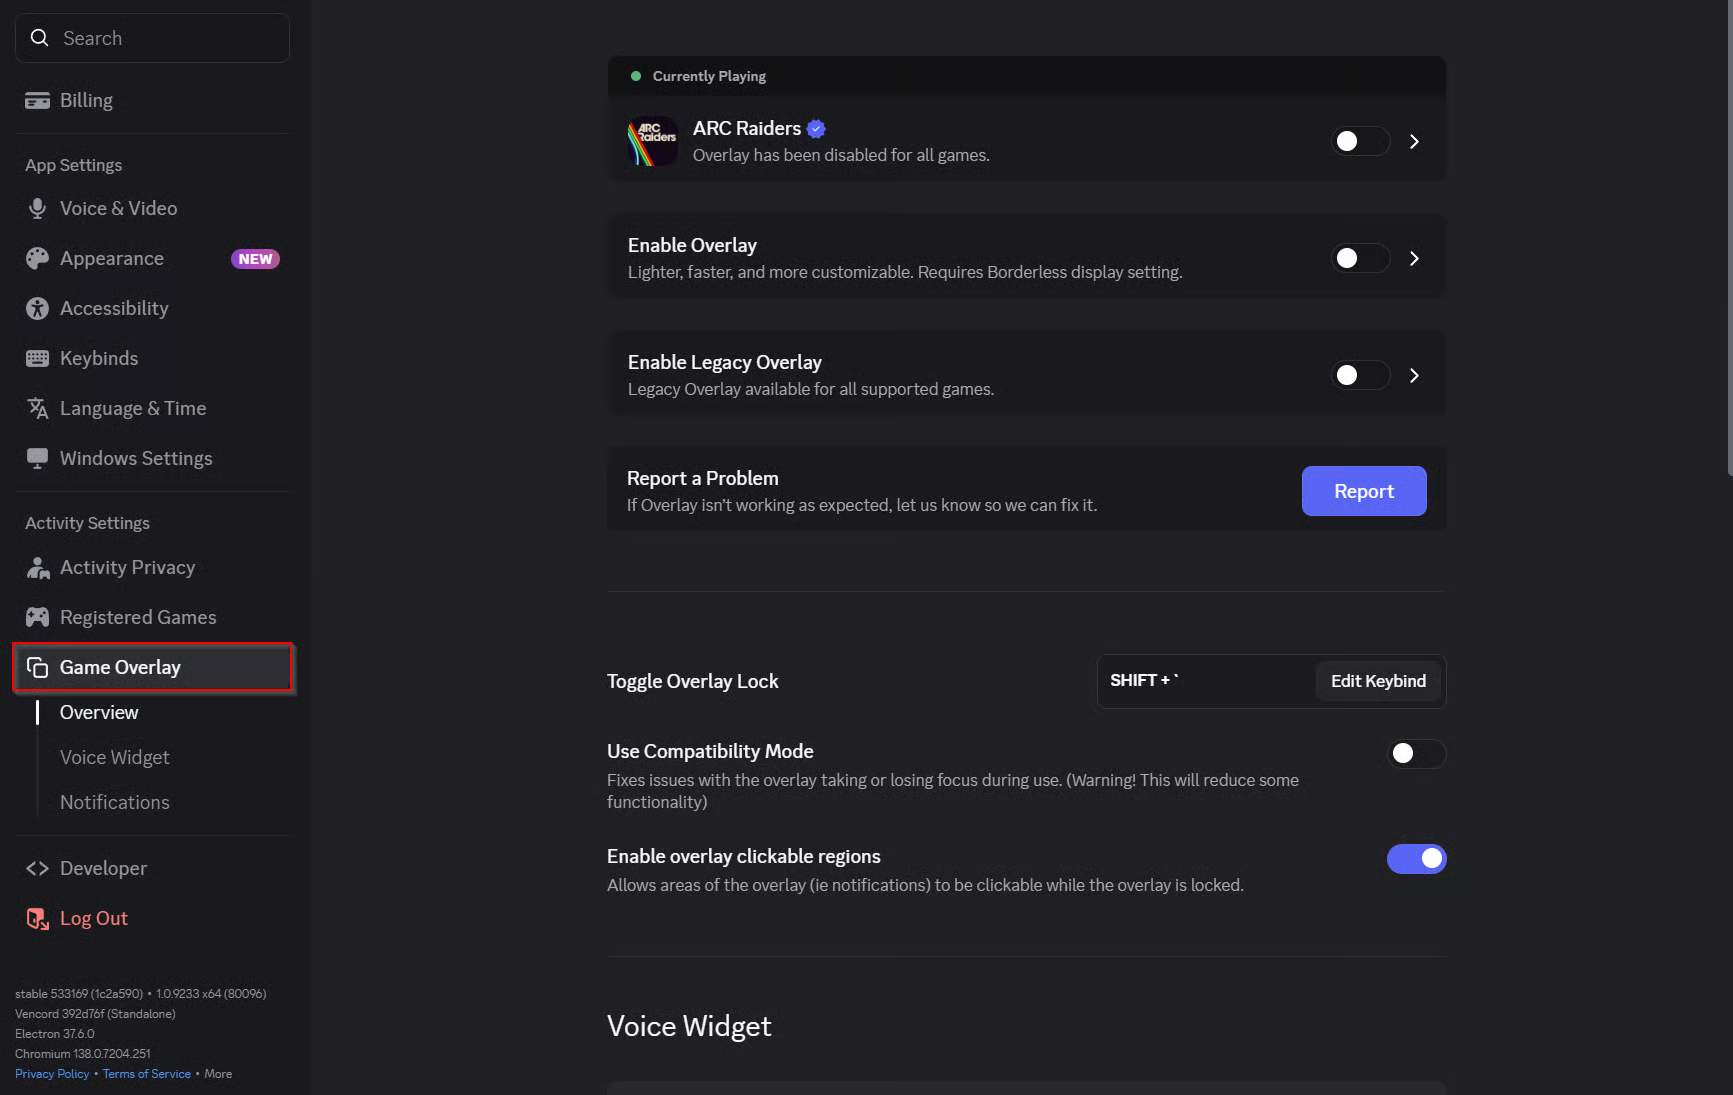
Discord Settings → Game Overlay
Enable the overlay for ARC Raiders
Turn on the overlay and enable it specifically for ARC Raiders. If the game isn't running, it appears under Per-game Override.
Keep Legacy Overlay turned off.
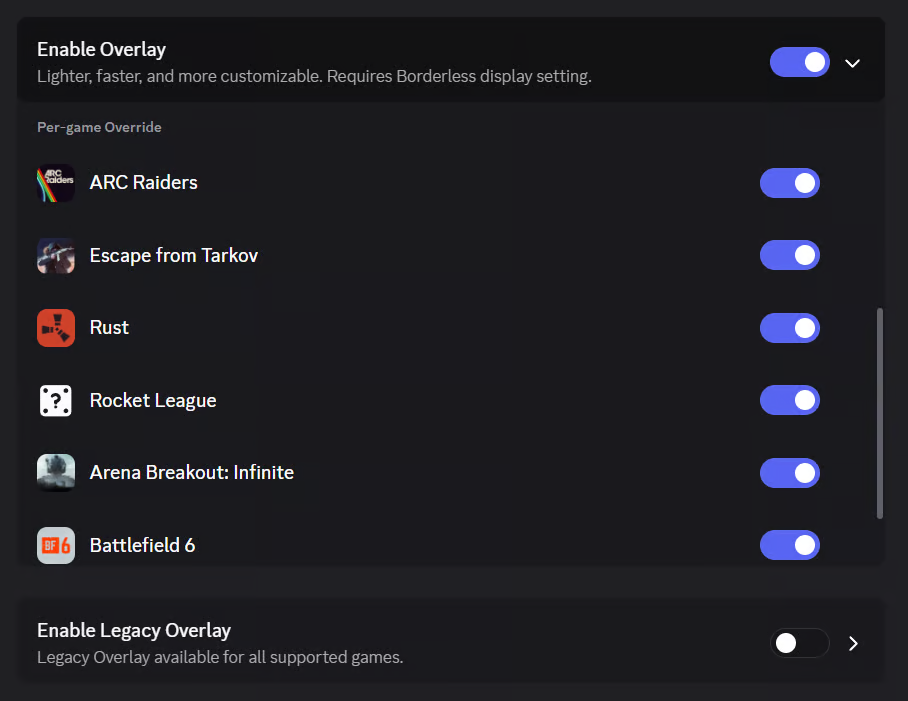
Enable Overlay with ARC Raiders enabled under Per-game Override
Enable Hardware Acceleration
Discord Settings → Appearance → Advanced → Enable the "Enable hardware acceleration" setting.
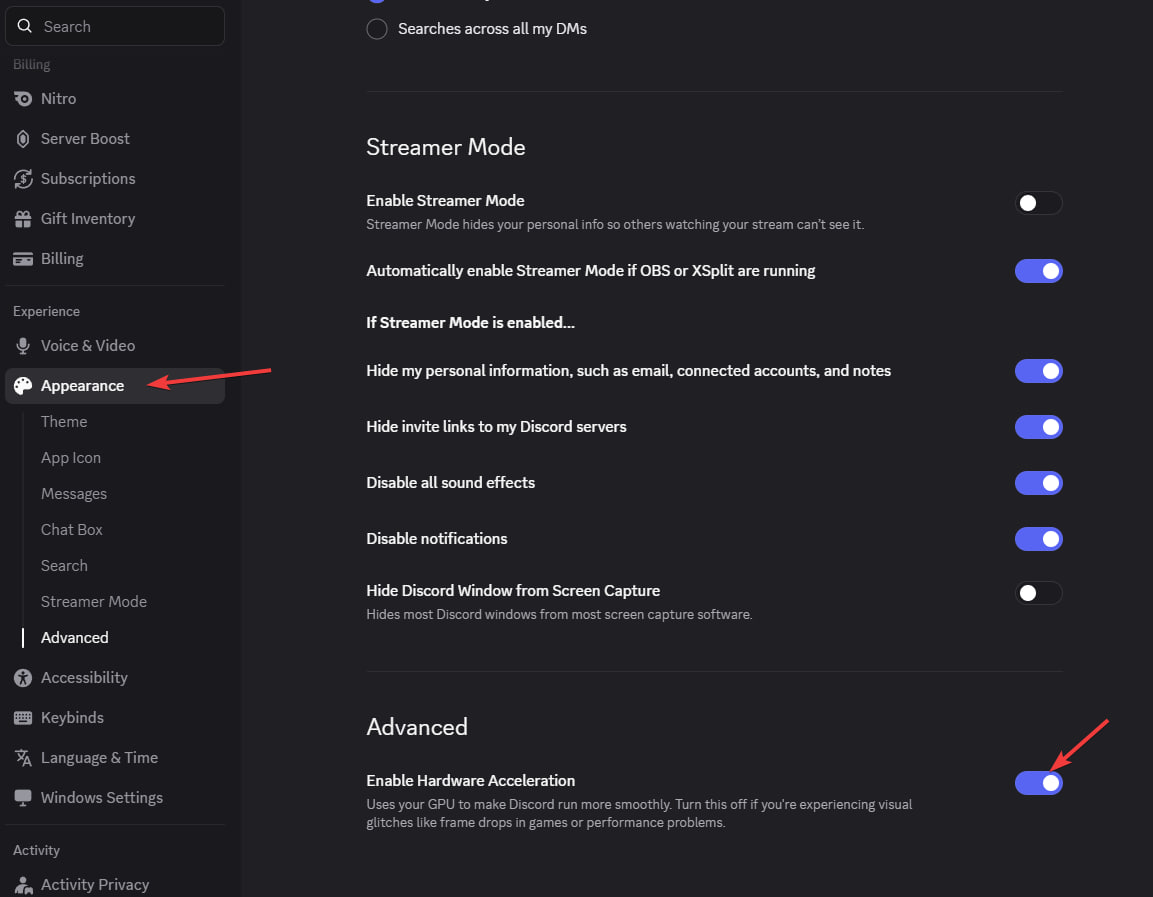
Discord Appearance → Advanced → Enable Hardware Acceleration
Initialize the overlay
Keep Discord running, then press Load in the loader.
Load the cheat
Press Load and launch the game once the loader closes after finishing its download.
During initial setup you may receive a "You're about to be signed out" message — this is expected.
Wait for the cheat to initialize
Menu initialization can happen within seconds or after up to a minute. Wait around 2 minutes after loading your game before assuming an issue.
Toggle the cheat menu
The menu toggle key is Insert.
If your keyboard doesn't have an Insert key, use the remapping guide below.
⌨️Remapping the Insert Key (optional — only if needed)
Install the PowerToys app
Open the Microsoft Store, search for PowerToys, install and launch it.
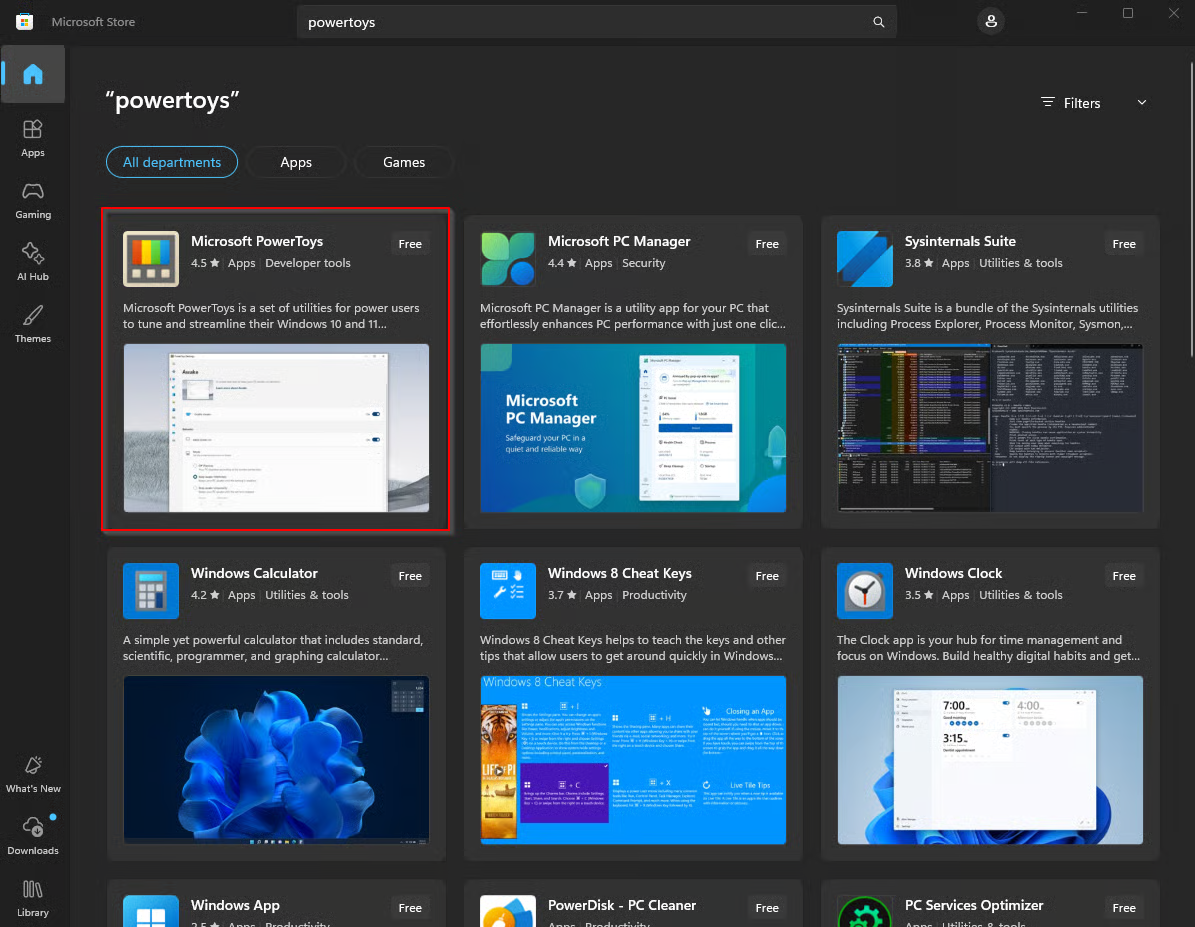
Microsoft Store — search PowerToys and install
Open & configure the key remapping
Go to Input & Output → Keyboard Manager and enable it.
Click Remap a key → Add key remapping.
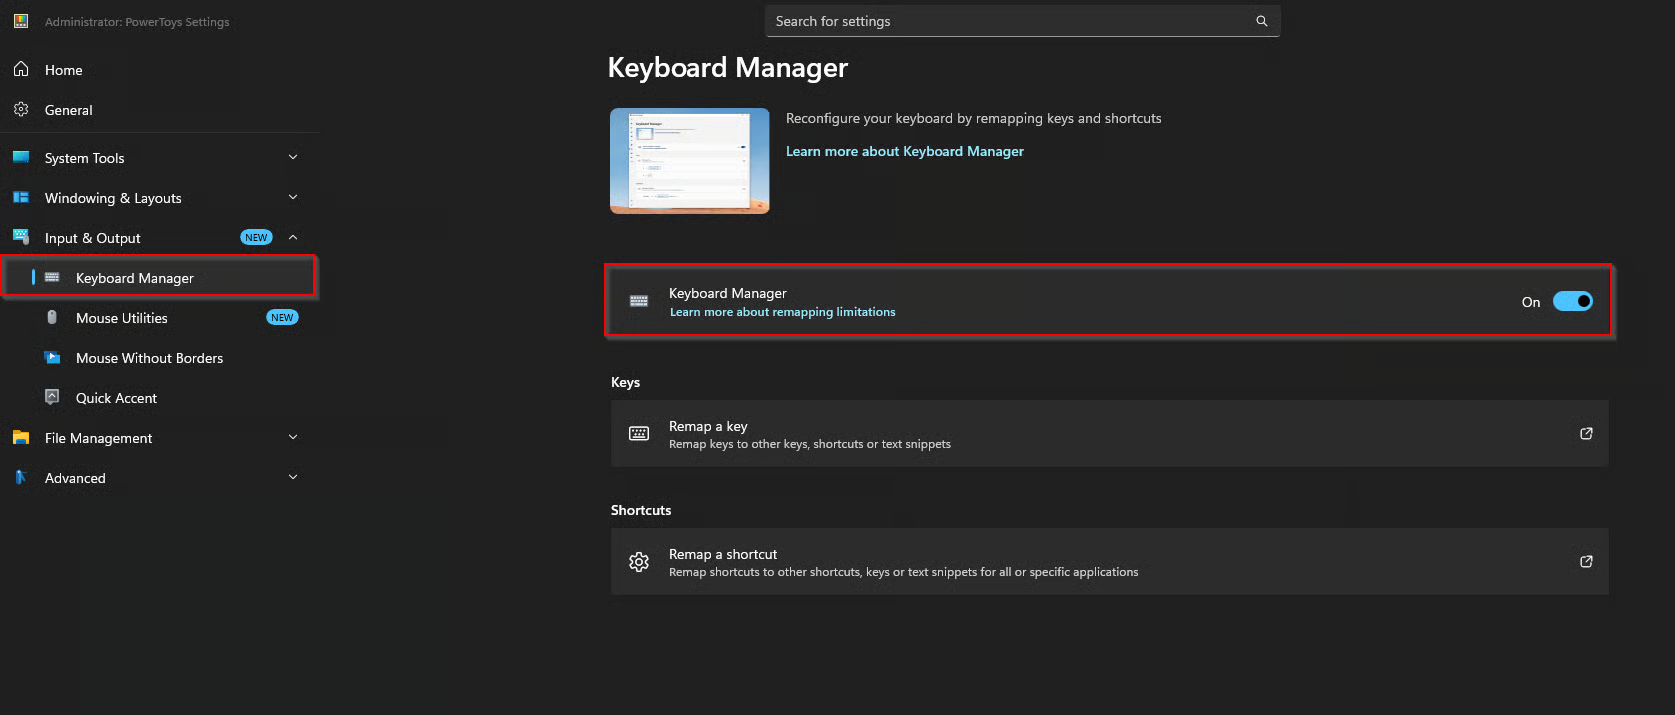
PowerToys → Keyboard Manager — enable it
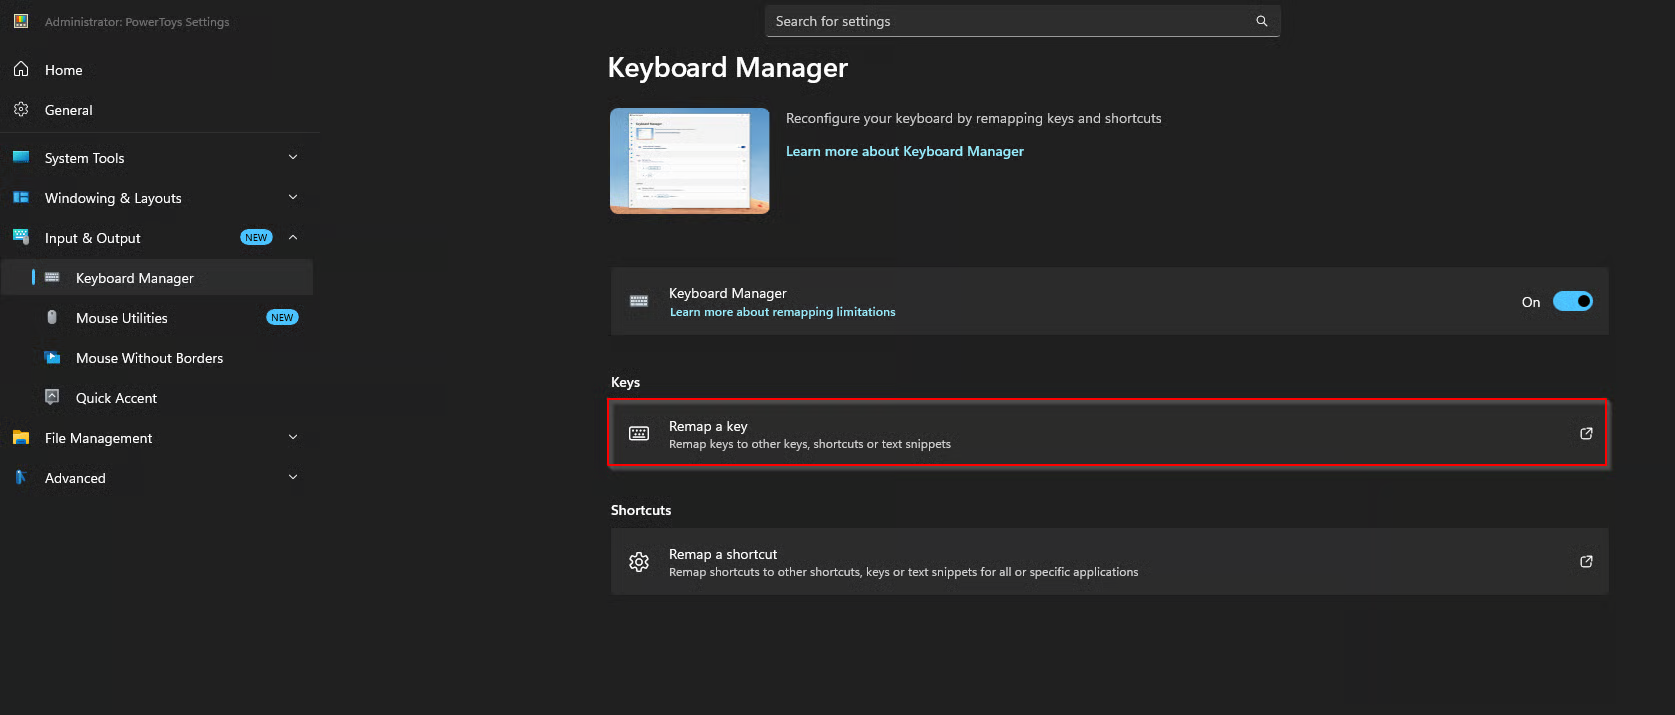
Click 'Remap a key'
Click Select, press the key you want to use, confirm it under "Key selected" and click OK. Change To send to Insert, press OK, then Continue anyway if prompted.
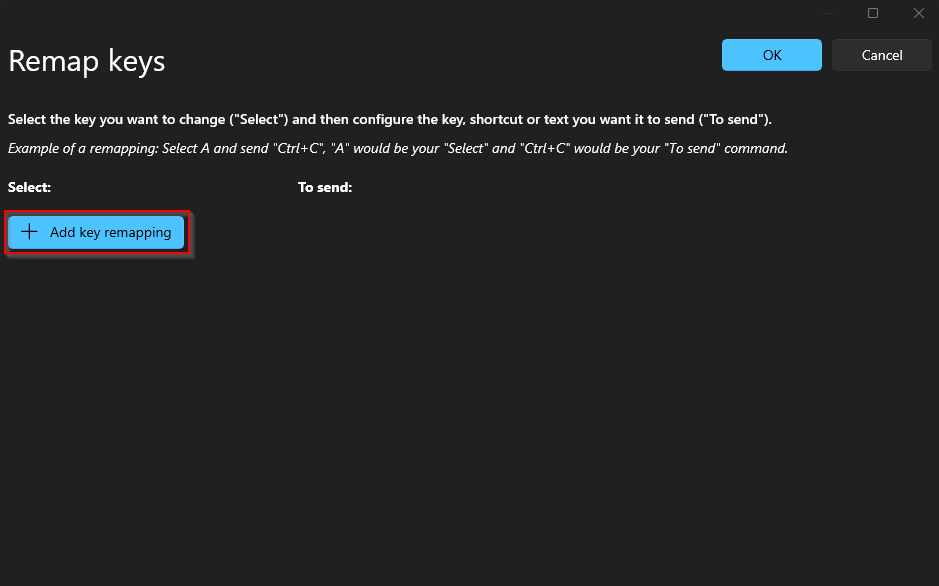
Click + Add key remapping
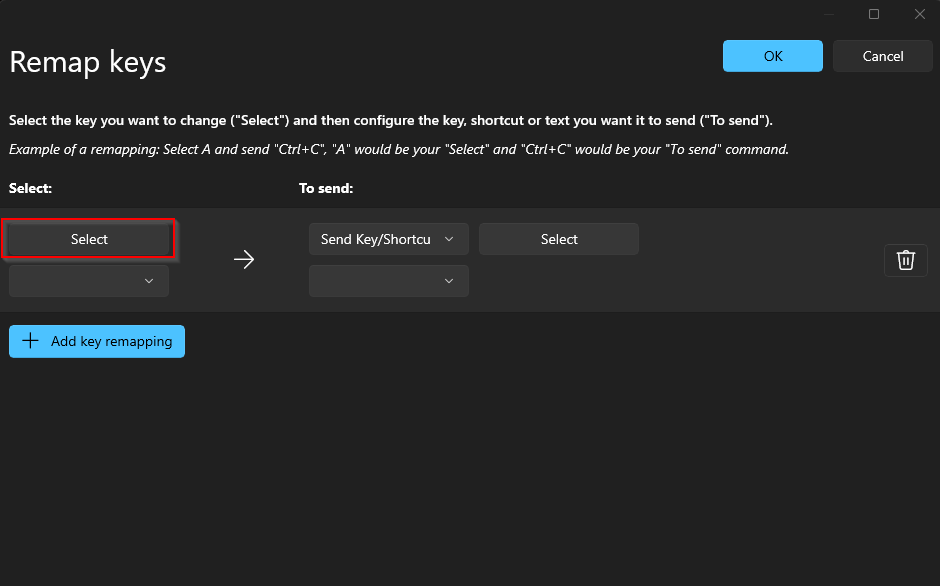
Click Select and press the key you want
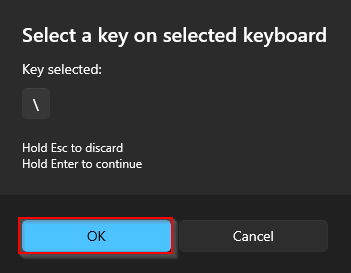
Confirm your selected key
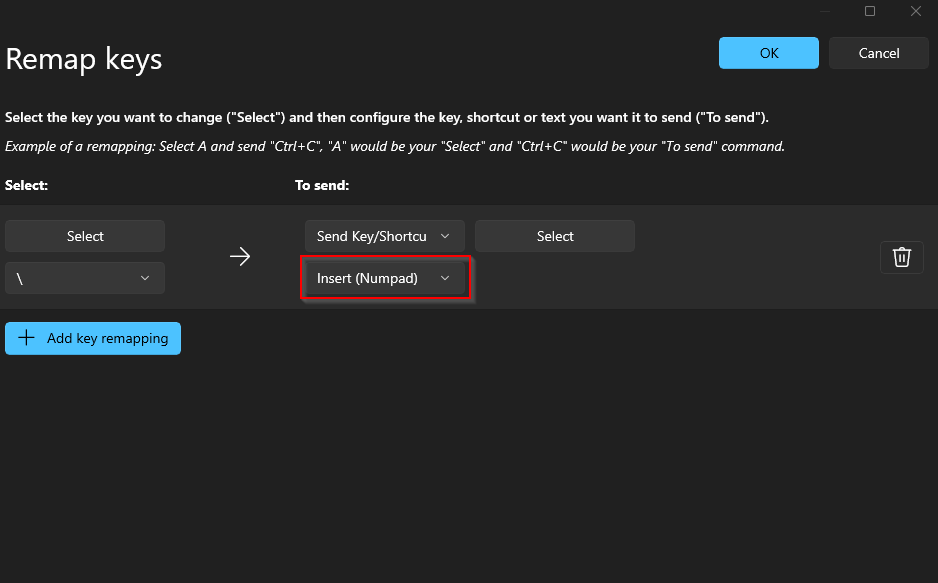
Set 'To send' to Insert (Numpad)
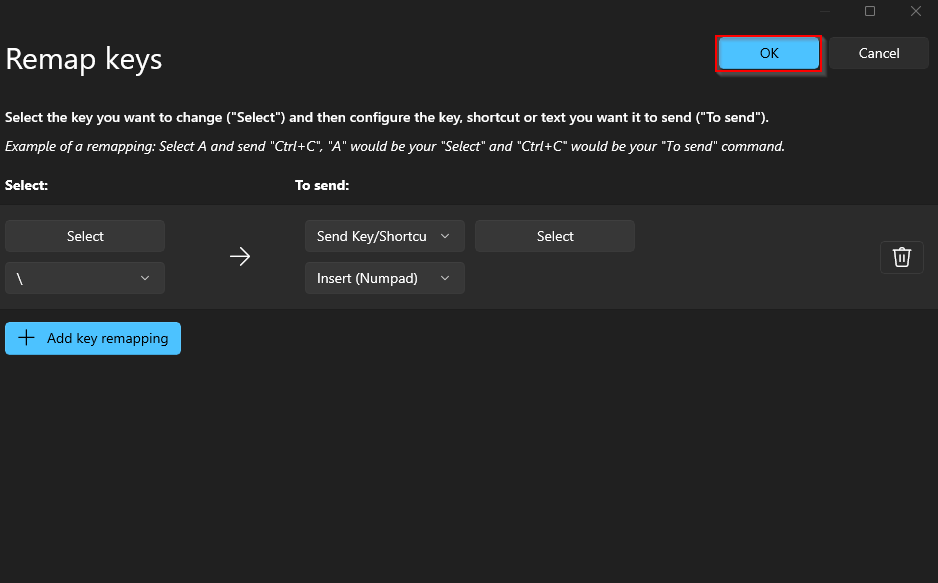
Press OK
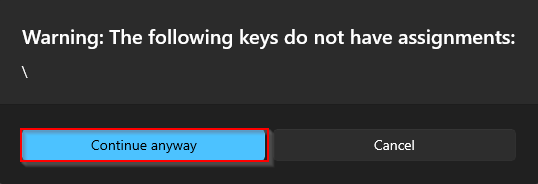
Click 'Continue anyway' if prompted
Done!
Your remapped key now registers as Insert and toggles the menu.
Avoid Bans
Most bans happen because of aimbot use. Whenever possible, use ESP-only — it avoids the mouse and aim tracking that anti-cheats look for.
Troubleshooting & Error Fixes
Open the fix that matches your issue. You only need the ones relevant to the error you're seeing.
FIXPlease make sure PIN is not set in Windows sign-in options and manually disable Hyper-V
Open Sign-in Options
Open Windows search, type Sign-in Options, then open it in Settings.
Find and disable the "For improved security…" setting
Ensure the setting shown below is disabled.
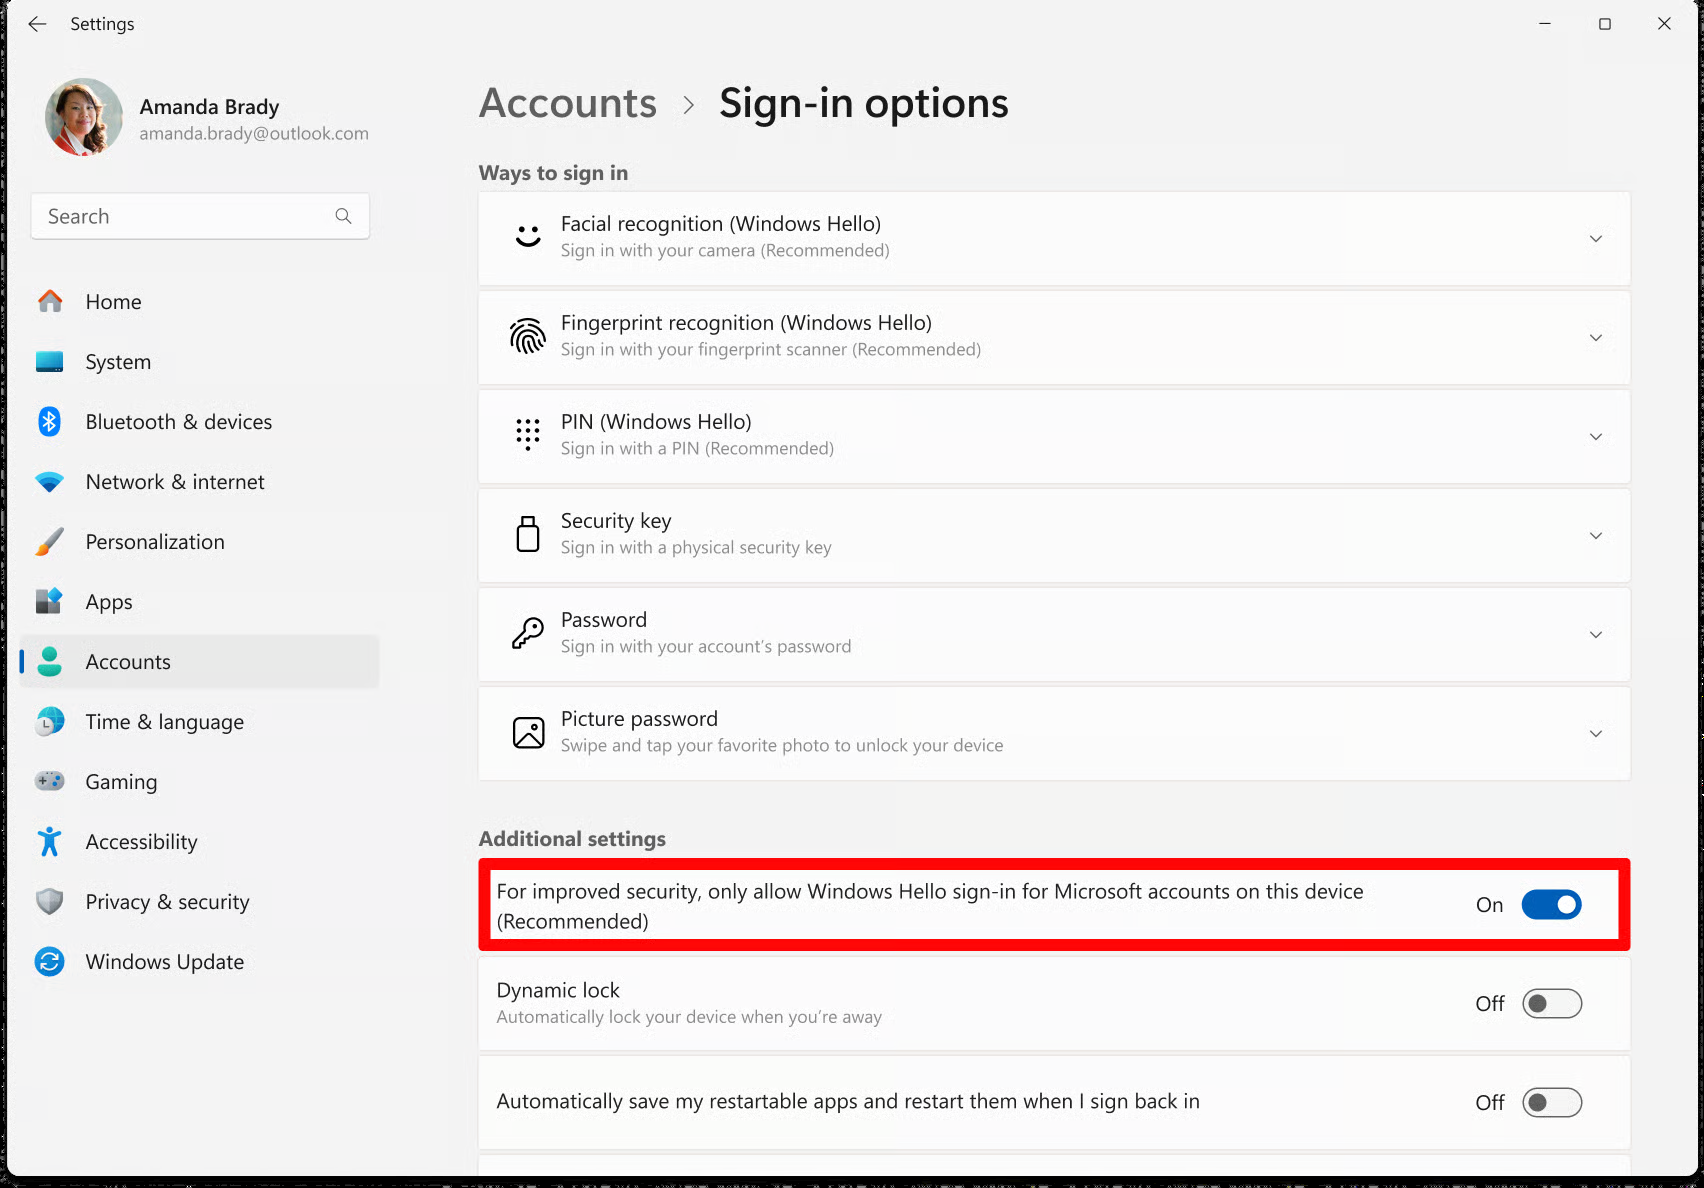
Settings → Accounts → Sign-in options
Remove your PIN if set
Click on PIN (Windows Hello) and ensure it is NOT SET. If it is, remove it and make sure a password is set instead.
Download & run the fix file
The fix file will automatically restart your PC after 10 seconds. Download link available via support ticket.
FIXAny Disable / Failed To Disable Hyper-V Errors
Download & run the fix file — it will automatically restart your PC after 10 seconds. Download link available via support ticket.
FIXFailed to allocate / map memory
Disable all Startup Apps
Open Task Manager → Startup Apps → disable everything, then restart your PC and try again.
Make sure the loader is on your local PC
The loader must be on your local drive — not on cloud storage like OneDrive or Mega.nz.
Download AutoRuns and clean startup entries
Download AutoRuns (Microsoft Sysinternals) and disable everything related to Microsoft/Windows/CurrentVersion/Run. Do NOT touch anything else.
FIXRun DISM Repair Commands / Failed To Repair Files / Restore System Files
Open Command Prompt as Administrator. Enter each line below separately, waiting for each to finish before doing the next:
Restart your PC when all commands complete.
FIXFailed to load crt lib / Install Visual Runtimes
Download Visual C++ Redistributable Runtimes All-in-One
Download link available via support ticket.
Extract the folder
Run install.bat
Run the install.bat file inside the extracted folder and wait for it to finish installing everything.
Restart your PC
FIXInstall DirectX
Download the DirectX Setup
Download link available via support ticket.
Run the installer and wait until it finishes
Restart your PC
Still need help?
Open a support ticket on Discord and our team will assist you directly.
Open a Ticket on Discord